


June is not the time to discover your AC isn't working properly. By the time summer heat peaks, HVAC technicians are fully booked, parts are on backorder, and emergency service calls come with emergency pricing. The homeowners who stay comfortable all summer — and keep their energy bills reasonable — are almost always the ones who spent an hour or two in May getting ahead of it.
This checklist covers everything worth doing before July arrives. Some of it takes five minutes. Some of it involves a professional. All of it is easier, cheaper, and less stressful to do now than after the first 95-degree day.
The AC System
1. Replace the Air Filter
Start here. It takes two minutes, and it's the single most impactful maintenance task a homeowner can do for their AC system.
A clogged filter restricts airflow through the system, forcing the blower motor to work harder and reducing the amount of air reaching the condenser coil. In summer, this means the system runs longer cycles to reach the set temperature, consumes more electricity, and puts more stress on components that are already working hard in peak heat.
Check the filter monthly during summer and replace it when it's visibly dirty — don't wait for a scheduled interval if the filter is clearly clogged. In homes with pets, multiple occupants, or dusty environments, monthly replacement during summer months is often appropriate.
Use a filter with a MERV rating between 8 and 13. Higher isn't always better — filters above MERV 13 can restrict airflow enough to affect performance unless your system is specifically rated for them.
2. Clear the Area Around the Outdoor Condenser Unit
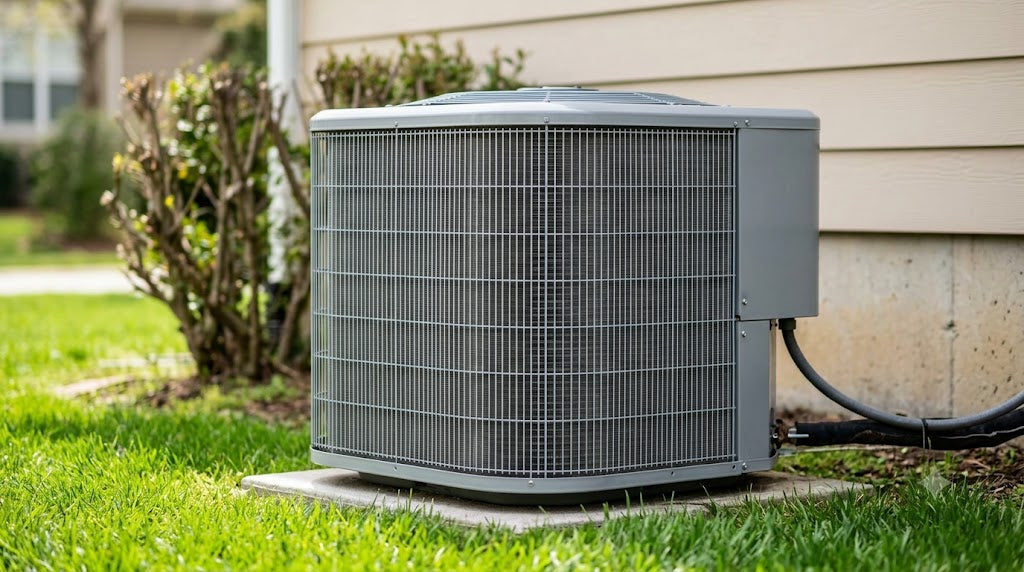
Walk outside and look at your condenser. Is there vegetation growing against it? Leaves or debris accumulated in the fins? A fence or wall within a foot of any side?
The condenser works by pulling air in through the sides and expelling hot air upward. It needs clear space — at least 12 to 18 inches on all sides and several feet of clearance above the unit — to do this effectively. Anything that restricts airflow forces the compressor to work harder and run hotter, which shortens its life.
Trim back any shrubs or plants that have grown close over the winter. Clear away leaves, grass clippings, or debris that have accumulated against the fins. Do this gently — the aluminium fins that cover the coil are easy to bend and damage with aggressive hosing or physical contact.
3. Clean the Condenser Coil
While you're outside, inspect the condenser coil — the grid of fins that wraps around the unit. Over time, cottonwood seeds, dirt, and debris accumulate between the fins and reduce the coil's ability to release heat. A dirty condenser coil can reduce system efficiency by 10 to 30%.
Light debris on the exterior fins can be carefully rinsed off with a garden hose — spray from the inside out if possible, with gentle pressure. Significant buildup, particularly if it has packed into the coil and isn't coming loose with water, is worth having a professional clean with a proper coil cleaner during an annual service call.
4. Inspect the Refrigerant Lines
The two copper pipes that run from the condenser to the indoor unit should be wrapped in foam insulation. Check the insulation for deterioration — it dries out, cracks, and falls away over time, particularly in hot climates where it's exposed to UV radiation.
When the insulation is compromised, the suction line (the larger of the two pipes) sweats and loses efficiency. Replacement foam pipe insulation is inexpensive and available at any hardware store. It's a simple DIY repair that improves both efficiency and system longevity.
Also look for any signs of oil staining around the connections or along the line — refrigerant leaks often leave an oily residue where they occur. If you see this, have it inspected by a professional before the heavy cooling season begins.
5. Test the System Before You Need It
Turn the system on now, before the first hot day, and run it for a full cycle. You're checking a few things:
Does the outdoor unit start without struggling? (Hard starting — where the compressor hesitates or shuts off immediately — suggests a failing capacitor.)
Does cold air come through the vents within a few minutes? (If the system runs but doesn't cool, you may have a refrigerant issue or a failing compressor.)
Are there any unusual noises — grinding, rattling, or persistent clicking? (New noises are a signal that something has changed since last season.)
Does the temperature actually drop to the set point within a reasonable time? (If the system runs for 30 minutes without reaching the target, it may be undersized for the current load or losing capacity with age.)
Catching a problem in May means a scheduled service appointment at standard rates. Catching it on July 4th means a very different experience.
6. Schedule Professional Maintenance
Everything above is homeowner-level maintenance. A professional tune-up goes several steps further — checking refrigerant charge and pressure, inspecting electrical connections and components, measuring amperage draw on the compressor and fan motors, lubricating moving parts, and testing the capacitors and contactors that are most likely to fail in peak summer heat.
Annual professional maintenance doesn't just prevent breakdowns — it catches the early-stage component degradation that, left unaddressed, leads to compressor failure. Capacitors and contactors are inexpensive to replace when they show early signs of wear. They become expensive problems when they fail at the worst possible moment.
If your system hasn't had a professional service in the past 12 months, schedule one before July.
The Home
7. Check Your Attic Insulation
Your AC system is fighting a constant battle in summer against heat that conducts through your roof and ceiling into the living space. Attic insulation is the primary barrier in this battle, and in many homes it's inadequate — either because it was never sufficient or because it has compressed and settled over the years.
The Department of Energy recommends R-38 to R-60 for attic insulation in most US climate zones. If your attic insulation is thin, patchy, or visibly degraded, adding insulation is one of the highest-ROI home improvement investments available — reducing cooling costs significantly and reducing the load on your AC system.
This is a job worth getting a professional assessment on, but the visual check costs nothing. Pop the attic access panel and look. If you can clearly see the joists with very little insulation above them, it's worth addressing before summer.
8. Seal Air Leaks
Your AC system is cooling a defined volume of air. Every gap or crack that lets conditioned air escape or hot outside air in makes the system work harder to maintain temperature.
Common leak points include:
-
Door frames and window frames (check for daylight or use a candle flame to detect air movement)
-
Electrical outlets and switch plates on exterior walls
-
Where pipes and wires penetrate walls and ceilings
-
Attic access hatches
Weatherstripping on doors compresses and loses effectiveness over time. Running a bead of caulk around window frames where they meet the wall takes 20 minutes and can make a meaningful difference to how hard your system has to work.
9. Check Your Ceiling Fans and Set Them Correctly
Ceiling fans don't cool air — they create a wind-chill effect that makes occupants feel cooler without changing the room temperature. Used correctly, ceiling fans allow you to set the thermostat 4 degrees higher while maintaining the same perceived comfort level. At current electricity rates, that's a meaningful reduction in cooling costs over a full summer.
Ceiling fans need to run counterclockwise in summer (when viewed from below) to push air downward and create the wind-chill effect. Most fans have a direction switch on the motor housing — check that yours are set correctly before summer.
Also check that all fan blades are present, balanced, and not wobbling. An unbalanced fan creates vibration that shortens motor life and makes an irritating noise.
10. Test Your Thermostat and Consider Upgrading
Set your thermostat to cooling mode and confirm it responds correctly — temperature drops, the system starts, and the thermostat accurately reads the room temperature.
If you're still running a non-programmable thermostat, this is a good time to consider upgrading. A programmable or smart thermostat that raises the temperature setpoint while the house is empty and cools it back down before occupants return can reduce cooling costs by 10% or more without any change in comfort. Setup takes under an hour and the hardware cost has dropped significantly in recent years.
The Big Picture Check
11. Know Your System's Age
If you don't know how old your condenser is, find out now. The age is usually printed on a label on the unit itself, often encoded in the serial number — most manufacturers use the first few digits to indicate the manufacturing year.
If the unit is 10 to 15 years old, this is the summer to pay close attention to performance and efficiency. If it's over 15 years old, start thinking about replacement planning — not because it will definitely fail this summer, but because replacing on your schedule is dramatically better than replacing under emergency conditions.
Knowing where you stand lets you make a plan. Maybe you run the existing system through this summer and replace in the fall when contractor availability is better and pricing is lower. Maybe you discover the system is actually younger than you thought and you have years ahead of you. Either way, you're informed.
The Payoff
This checklist takes most homeowners two to four hours across a Saturday morning — an hour or two of hands-on tasks and a phone call to schedule professional service. The payoff is a summer without breakdowns, energy bills that don't climb unnecessarily, and the confidence that your home's cooling system is ready for whatever the season brings.
The homeowners who stay coolest in July are rarely the ones with the newest equipment. They're the ones who showed up in May.


