


A mini-split air conditioner is one of the most efficient, versatile, and reliable comfort systems available to homeowners today. Whether you're cooling a room addition, a garage workshop, a home office, or an entire house through a multi-zone configuration, a well-maintained mini-split can deliver years — even decades — of quiet, energy-efficient performance.
The keyword there is well-maintained.
Like any mechanical system, a mini-split that gets ignored will eventually underperform, overwork, and fail ahead of its time. The good news? Keeping your system running at peak efficiency doesn't require specialized tools or an HVAC degree. Most of what your mini-split needs to stay healthy is simple, routine attention that any homeowner can manage with minimal time and effort.
At The AC Outlet — America's most trusted source for wholesale HVAC equipment for over 15 years — we've helped thousands of homeowners and contractors get the most out of their cooling and heating investments. Here are the 5 essential tips every mini-split owner needs to know.
Tip #1: Clean Your Indoor Air Filters — Every 2 to 4 Weeks
If there's one maintenance task that has the single biggest impact on your mini-split's performance, efficiency, and longevity, it's this one: keeping the indoor unit's air filters clean.
Unlike traditional ducted systems where filters are tucked away in a return air grille, mini-split indoor units have washable mesh filters located directly inside the front panel of the air handler — making them remarkably easy to access and clean. Most manufacturers recommend cleaning these filters every two to four weeks during periods of regular use, and more frequently in dusty environments or homes with pets.
How to clean your mini-split filters:
Start by turning the system off at the thermostat or remote control. Open the front panel of the indoor unit — on most models this simply lifts or snaps open without tools. Carefully slide the mesh filter panels out, noting their orientation so you can reinstall them correctly. Take the filters outside or to a sink and rinse them gently with lukewarm water, using a soft brush if needed to dislodge stubborn dust buildup. Never use harsh detergents, hot water, or abrasive scrubbers — these can damage the fine mesh material. Allow the filters to air dry completely before reinstalling. Never run the system with wet filters in place.
Why it matters so much: A clogged filter forces your mini-split's blower to work harder to pull air through the restricted mesh — reducing airflow, dropping efficiency, increasing energy consumption, and putting unnecessary mechanical stress on the fan motor and compressor. In extreme cases, severely restricted airflow can cause the indoor coil to freeze over — a problem that cascades quickly into more serious and expensive damage.
A clean filter takes five minutes to wash. A frozen coil or failed blower motor costs hundreds to repair. The math is obvious.
Tip #2: Keep the Outdoor Condenser Unit Clear and Clean
Your mini-split's outdoor condenser unit is doing some of the heaviest lifting in the entire system — compressing refrigerant, rejecting heat to the outside air, and running through thousands of cycles per season. Keeping it clean and unobstructed is essential to protecting that investment.
Clear the area around the unit regularly. Maintain a minimum clearance of 18 to 24 inches on all sides of the outdoor unit at all times. Overgrown shrubs, tall grass, stacked firewood, lawn furniture, and accumulated debris can all restrict the airflow the condenser needs to operate efficiently. Poor airflow around the outdoor unit forces the compressor to work harder, raises operating temperatures, reduces efficiency, and accelerates wear.
Clean the condenser coil fins annually. Over time, the aluminum fins on the outside of the condenser coil accumulate dirt, pollen, cottonwood fluff, and other airborne debris that reduces the unit's ability to reject heat effectively. An annual gentle rinse with a garden hose — spraying from the inside out if possible, never with a pressure washer — removes this buildup and restores full heat transfer capacity. If the fins are heavily soiled, a commercially available coil cleaner spray can help break down stubborn deposits before rinsing.
Check for ice formation in winter. If you use your mini-split for heating during colder months, some frost accumulation on the outdoor unit during defrost cycles is completely normal. However, if you notice heavy ice buildup that doesn't clear between cycles, this may indicate a refrigerant issue or a defrost control problem that warrants a service call from a qualified HVAC technician.
Protect the unit during off-season storage. In regions with harsh winters where the mini-split won't be used for extended periods, a breathable cover designed specifically for HVAC outdoor units can protect against debris accumulation. Never use a solid, non-breathable cover while the unit is operating — this traps heat and can cause serious damage.
Tip #3: Inspect and Clean the Indoor Evaporator Coil and Blower Wheel Annually
Cleaning the filters regularly handles the first line of defense against dust and debris — but over time, fine particles that pass through the filter mesh accumulate on two other critical components inside the indoor unit: the evaporator coil and the blower wheel. Both need periodic attention beyond basic filter cleaning.
The evaporator coil is the finned aluminum coil that sits behind the filters inside the indoor unit. It's where refrigerant absorbs heat from your room air — and where condensation forms during the cooling process. Dust and biological growth on the coil surface act as insulation, reducing heat transfer efficiency and making your system work harder for the same result. A dirty evaporator coil is also one of the leading causes of musty or moldy odors coming from mini-split indoor units — a complaint that's far more common than most homeowners realize.
The blower wheel — the cylindrical fan that circulates air across the coil — is notorious for accumulating thick layers of dust, mold, and debris over time, particularly in humid environments. A heavily fouled blower wheel is dramatically less efficient than a clean one, and the imbalanced weight of accumulated buildup can cause vibration and premature bearing failure.
For most homeowners, annual professional cleaning of the coil and blower wheel is the most practical approach. HVAC technicians have specialized foaming coil cleaners, blower wheel brushes, and equipment covers to perform a thorough deep clean without damaging the unit or making a mess. In particularly humid environments — or homes where the system runs year-round — a semi-annual deep clean may be warranted.
Between professional cleanings, no-rinse evaporator coil spray cleaners available at HVAC supply stores can help maintain coil cleanliness when applied carefully per the product instructions.
Tip #4: Check the Condensate Drain Line and Keep It Clear
Every time your mini-split operates in cooling mode, the evaporator coil removes moisture from the air as part of the dehumidification process — and that moisture has to go somewhere. It drips off the coil into a condensate drain pan and flows out of the building through a condensate drain line — typically a small PVC pipe that exits through the wall near the indoor unit.
This drain line is one of the most overlooked components in mini-split maintenance, and a clogged condensate drain is one of the most common causes of water damage, indoor unit overflow, and system shutdowns.
What causes clogs? Over time, algae, mold, mildew, dust, and biological slime accumulate inside the condensate drain line — particularly in warm, humid climates where the system runs heavily and moisture is abundant. A partial clog slows drainage and allows water to back up into the drain pan. A complete clog causes the pan to overflow — potentially damaging walls, ceilings, flooring, and the indoor unit itself.
How to prevent clogs: Every one to three months during cooling season, pour a quarter cup of distilled white vinegar or a diluted bleach solution (one part bleach to ten parts water) into the condensate drain pan or access port if your system has one. This inhibits biological growth inside the drain line and keeps it flowing freely. Some homeowners use condensate drain tablets — small slow-dissolving tablets that continuously inhibit algae growth — as a convenient alternative.
How to clear a clog: If you notice water dripping from the indoor unit, gurgling sounds from the drain line, or your system shutting off unexpectedly (many mini-splits have a safety float switch that cuts power when the drain pan fills), the drain line likely needs to be cleared. A wet/dry vacuum applied to the end of the exterior drain line for 30 to 60 seconds will often pull the clog free. For stubborn blockages, a professional flush with compressed nitrogen or a drain snake may be required.
Keeping that condensate drain clear is one of the simplest and most impactful things you can do to protect your mini-split — and your home — from water damage.
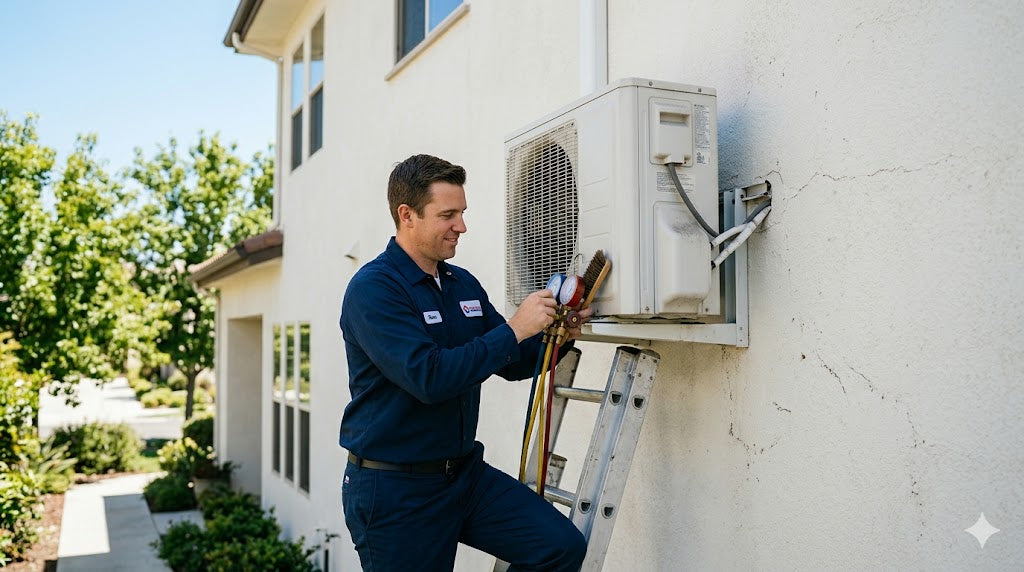
Tip #5: Schedule Annual Professional Maintenance — Don't Skip It
The four tips above are all things a diligent homeowner can handle independently. But there's a fifth layer of mini-split maintenance that requires a licensed HVAC technician — and skipping it is one of the most common and costly mistakes mini-split owners make.
Annual professional maintenance for a mini-split system should include the following:
Refrigerant level check. Unlike filters or drain lines, refrigerant is a closed-loop system — your mini-split should never consume or lose refrigerant under normal operating conditions. If refrigerant levels are low, it means there's a leak somewhere in the system that needs to be found and repaired before the unit is recharged. Running a mini-split with low refrigerant damages the compressor — the most expensive component in the system — and dramatically reduces both cooling and heating capacity.
Electrical connection inspection. Heat cycles, vibration, and time can loosen electrical connections and terminals inside both the indoor and outdoor units. Loose connections cause resistance heating, arcing, and in worst cases, electrical fires. A technician will inspect and tighten all connections, check capacitor health, and verify that contactor contacts are clean and making proper contact.
Inverter and control board diagnostics. Modern mini-splits — including virtually all current-generation systems — use sophisticated inverter-driven compressors and electronic control boards. Many systems store fault codes and operational data that a technician can read with a service tool to identify developing problems before they become failures.
Refrigerant line insulation inspection. The refrigerant line set connecting your outdoor and indoor units is wrapped in foam insulation that degrades over time — particularly where it's exposed to UV light and weather. Deteriorated insulation reduces system efficiency and can allow moisture condensation on the lines. A technician will identify sections needing re-insulation during the annual visit.
Overall system performance verification. Temperature differential checks, static pressure readings, and operational current draw measurements give a technician a complete picture of how your system is performing relative to its rated specifications — and flag any deviations that warrant further investigation.
The cost of an annual mini-split tune-up typically runs $80 to $150 depending on your market. The cost of a compressor replacement due to neglected maintenance can run $800 to $1,500 or more — and in many cases, makes replacement of the entire outdoor unit the more economical choice. Annual maintenance isn't an expense. It's an investment with an exceptionally clear return.
Bonus Tip: Know When It's Time to Replace, Not Repair
Even the best-maintained mini-split system has a finite service life. Most quality mini-split systems — properly maintained — deliver 15 to 20 years of reliable service. As your system approaches that range, or if repair costs start climbing toward 50% of replacement cost, it's worth having an honest conversation about whether repair or replacement makes more financial sense.
When that time comes, The AC Outlet is your best source for wholesale HVAC equipment — with top brands, competitive pricing, and the expert support to help you choose the right replacement system for your home and budget.
Why Thousands of Homeowners and Contractors Trust The AC Outlet
For over 15 years, The AC Outlet has been the go-to wholesale HVAC source for homeowners, contractors, and builders across the United States. Here's what makes us different:
True Wholesale Pricing — No markup, no retail premium. You pay what the pros pay, directly.
Top Brand Selection — Goodman, Airquest, Rheem/Ruud, Revolv, York, TuttoKool, and more — the brands that HVAC professionals trust most.
110% Price Match Guarantee — We'll beat any legitimate competitor price, guaranteed.
0% APR Financing Through Affirm — Flexible payment options that make quality equipment accessible on any budget.
8,858+ Verified 5-Star Reviews — Real customers. Real satisfaction. A 4.8-star average that speaks for itself.
7-Day Expert Support — Our HVAC specialists are available Monday through Sunday to answer your questions, confirm compatibility, and help you make the right purchase decision.
Nationwide Freight Shipping — Fast, reliable delivery to every corner of the country.
A Little Maintenance Goes a Long Way
Your mini-split is a sophisticated, high-value piece of equipment — and it responds directly to the level of care you give it. Clean the filters every few weeks. Keep the outdoor unit clear. Schedule an annual professional tune-up. Stay on top of the condensate drain. These aren't complicated tasks, but they are the difference between a system that performs beautifully for 20 years and one that struggles, fails early, and costs you far more than it should.
Take care of your mini-split, and your mini-split will take care of you — season after season, year after year.


